Posts

Pink or Blue? Chalkboard Gender Reveal Ideas

Image
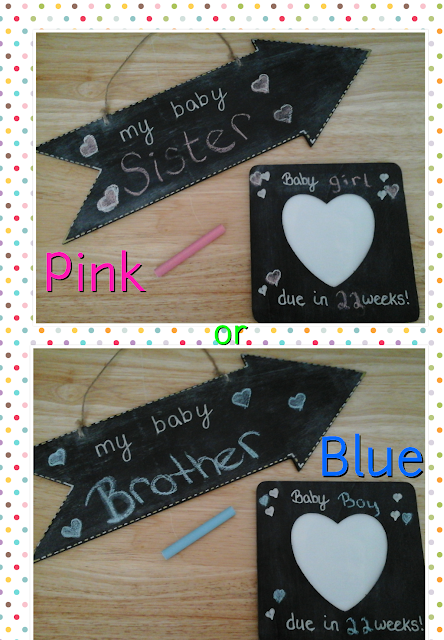
This year is going to bring some big changes for us as our family of 3 becomes a family of 4! We are very excited and naturally I have started crafting and thinking of fun and creative ideas to announce our news, to countdown the weeks and right now, one of the big milestones, announcing the gender! There are some many great ideas for gender reveal. You can use cake! You can't go wrong with cake, by dying the cake itself either pink or blue and ising fondant icing to hide the surprise or the cupcakes where you pipe colored icing into the middle of the cupcakes. Balloons are another fun way to reveal the gender. This is an easy DIY reveal, fill a large box with pink or blue helium balloons and seal the box until the reveal. Or you can get a large dark colored balloon filled with pink or blue balloons or confetti that you can pop to reveal the gender. I was looking more for a way to reveal the gender through a picture that I could email to our family and friends. It was fu...

DIY Lego Valentine's Gift

Image
Your little Master Builders can make this heart shaped box for their Valentine. Or, you can surprise them and show them that you like playing with Lego as much as they do. It's the perfect little box to fill with chocolate or any other sweet treat. What you need: Red and white Lego  (multi colored would look nice too. Use what you have on hand, or under foot) Chocolate or candy  What to do: Start by making the shape of a heart using 2x2 and 2x6 flat bricks. Build up the heart shape using 1x1 and 1x6 bricks, build 3 layers of bricks Carefully turn the heart over, use 4x4 and 4x6 flat bricks to make the bottom of the box. To make the lid: Flip the box right side up Using 2x6 and 2x2 flat bricks recreate the shape of the box. Make 2 or 3 layers of bricks so that the lid is stable. Using 1x1 red bricks make the heart design in the middleof the lid. Fill with candy! Happy Valentine's Day!

New Year, New Look

Image
I'm not one for making hard and fast New Years resolutions. I have made some from time to time, this blog is one example. In 2013 I resolved to start a blog and stick to it, there have been other failed attempts. There have been sometimes when I haven't posted as much as I would have liked but that's life interrupting, all in all I like blogging and this is the only resolution that I've really stuck with. This year I'm going to make a vague resolution to change things up a bit. I'm going to give JustAddStickers a little bit of a face lift. A new look for a new year. And minimum 1 post per month. Thanks for reading, happy New Year and happy crafting!

Looking Back

Image
We had some good times this year making lots of fun crafts and good memoriess! Wishing you all a very happy New Year!

Candy Cane Cookies

Image
This is one of my favorite Christmas cookies from when I was a kid. They are a little long to make but so delicious and fun to malke when you have little hands to help you roll out the dough. Ingredients: 1 cup butter 1 cup sugar 1 egg 1 1/2 tsp almond extract 1 tsp vanilla extract 2 1/2 cups flour 1 tsp salt red food coloring The dough: 1. Preheat oven to 375°F  line a baking sheet with parchment paper 2. Beat together butter, egg, sugar and flavors sift together flour and salt 3. Add the dry to the wet ingredients mix until well blended 4. Seperate the dough into two equal portions 5. Add the red food coloring to one of portions of dough. Making the cookies: 1. Roll two long thin ropes one of the red dough and one of the plain dough 2. Line the two ropes up side by side, cut the ropes into equal sized sections.    3. Twist each section then shape into candy canes. 4. Bake for 9 minutes until set and sl...

DIY Snowmen Jars

Image
These hot chocolate snowmen make great Christmas presents for your little ones to make for their teachers or grandparents. I have seen these made with baby food jars but since I didn't have any we made a bigger version with jars from the dollar store. What you need: Jars (it takes 3 jars per snowman, I used a smaller one for the head and equal sized ones for the body) Hot chocolate mix Mini marshmallows Peppermint candy Felt, red (for the scarves) orange (for the noses) Black sharpie Glue gun Super glue What you do: Decide how many snowmen you are going to make. Group all the jars together for each snowman. Cut out the number of noses and scarves you need. Glue the noses on the smallest jars. Draw eyes and a mouth with the black marker.  For each smowman draw buttons on one of the bigger jars. Fill the smallest jars with marshmallows. Fill the jars with buttoms with the peppermint candy. Fill the remaining jars with hot chocola...

Fall Scavenger Hunt

Image
It's not too late to spend a nice afternoon outside. This scavenger hunt is a great activity to keep the kids interested on a fall hike. What you need: Small paper bags Markers Pencils What to do: Make a list of 8-10 fall items that you know are fairly common in your area Example: a leaf of each cololr, a rock, stick, an acorn, a pinecone etc. Write 'Fall Scavenger Hunt' on the bag in gray or black marker. Use the same marker to make 8-10 boxes (one for each item on your list) Using the colored markers write the list of items on the bag  (one item next to each box) Place one pencil in each bag (to mark items off as you go) You're ready to hike!  As you check items off your list place the item in the bag. At the end of the hike take the items out to see what everyone collected. Enjoy!