Posts

Showing posts from September, 2016

Learning to Sew: Tooth Fairy Pillow

Image
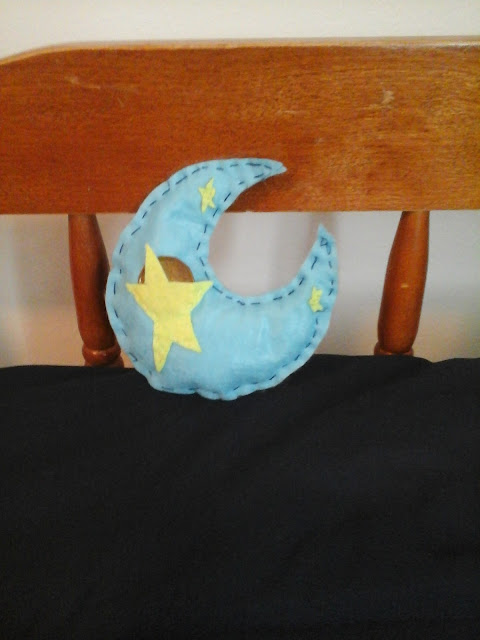
My little man lost his first tooth! We were talking about the toothfairy and I remembered the tooth pillow I had when I was little, it was a purple heart with a white and purple pocket to place the tooth in. I made my tooth pillow with my mom using my little sewing machine. Sewing is something my mother is good at that I remember learning from her. I am not an avid seamstress (and I don't have a sewing machine) but I do like sewing by hand. So I thought it would be a good time to teach my little man some sewing basics.  What you need: You might have what you need on hand if not you can find it all at the Dollarstore.  Needle and thread  (the thread doesn't have to be an exact match to the color of the material, having a darker thread will help your little ones to better see their stitches.) 3 pieces of felt  (2 pieces of the same color for the larger shape and another color for the tooth pocket and accents) Batting  (you don't have to use re

3 Step Burlap Wreath

Image
Of all the techniques to make burlap wreaths, this is my favorite. In 3 easy steps you can make a unique wreath for your front door. The fun thing about this wreath is the diversity of it, with a glue gun and some fabric leaves it can be a fall wreath, remove the leaves, add some lights and it's a Christmas wreath. The options are endless. What you need: 1 metal wreath frame 1 roll burlap ribbon 1 roll decorated burlap ribbon  (burlap printed with stripes, chevron or with lace accents) 1 wood letter (painted the color you want) 4 metal ties Glue gun Step 1: Pinch the end of the burlap together, using the metal ties attach the plain burlap to the smallest circle of the metal frame. The wreath frame is separated into 6 sections with 3 spaces in each, push the burlap through each of the three spaces, twist the burlap and do the same in the next section. Continue pushing the burlap through the spaces and twisting after each section. When you