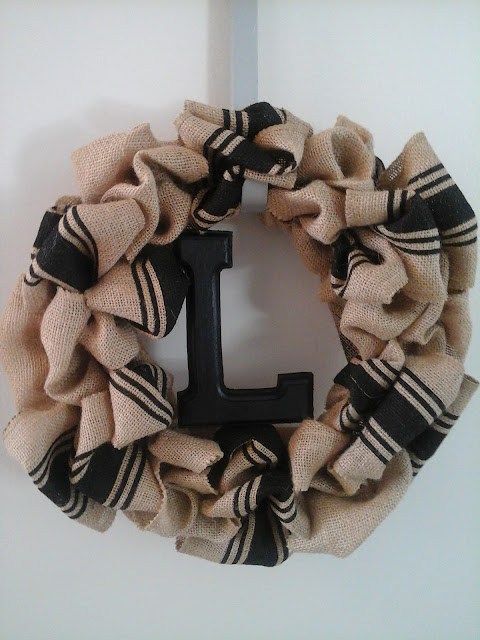
3 Step Burlap Wreath
Of all the techniques to make burlap wreaths, this is my favorite. In 3 easy steps you can make a unique wreath for your front door. The fun thing about this wreath is the diversity of it, with a glue gun and some fabric leaves it can be a fall wreath, remove the leaves, add some lights and it's a Christmas wreath. The options are endless.
What you need:
- 1 metal wreath frame
- 1 roll burlap ribbon
- 1 roll decorated burlap ribbon
- (burlap printed with stripes, chevron or with lace accents)
- 1 wood letter (painted the color you want)
- 4 metal ties
- Glue gun
Step 1:
Pinch the end of the burlap together, using the metal ties attach the plain burlap to the smallest circle of the metal frame. The wreath frame is separated into 6 sections with 3 spaces in each, push the burlap through each of the three spaces, twist the burlap and do the same in the next section. Continue pushing the burlap through the spaces and twisting after each section. When you finish the last section, cut the burlap and attach it to the frame with a metal tie. It's normal for it to look very messy.
Step 2:
Repeat the first step with the decorated burlap ribbon. Push the plain burlap to one side of the section and attach the decorated ribbon to the wreath frame. Push the decorated burlap through the spaces next to the plain burlap. Twist the burlap at the end of each section. When you reach the last section cut the burlap and attach it to the frame.
Step 3:
Add your decoration. Using a glue gun attach your letter in the middle or to the side. Now you can add any other festive touches: fabric leaves, foam hearts, clover garland etc.
Hang it on your door and you're done!


Comments
Post a Comment