Posts

Showing posts from 2023

DIY Picture Frame Art
Image
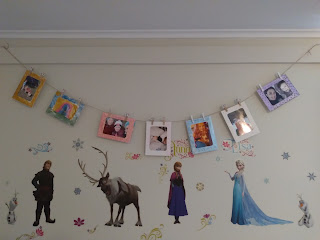
Best laid plans, I meant to post DIY projects every week in December but life got in the way and it was a busy but fun month. I had DIY present ideas to share but I will keep them for another time. This is a craft that is perfect for displaying your memories from the past year. In 2013 I shared this  New Year’s  photo craft, as a way to display our favorite pictures of the year. This year I found this picture frame garland that we decorated and filled with some of our best pictures of the year.  What you need: ● 1 paper picture frame garland package ( I got this one at the Dollar Store but I have also seen them at Michael's) ● Watercolor paints and/or markers ● Pictures from rhe year ● Optional - festive clothes pins (the picture frame garland package came with plain clothes pins but we chose these rainbow and unicorn ones, you could also decorate the plain ones)  Instructions: 1. Paint your picture frames. You can paint them according to seasons or to match your pictures or a colo

DIY Magic Mixie Cauldron Refill

Image
This year instead of doing Blogmas as I have for the past 2 years, I am going to try something a little different that I am going to  call DIY December. I am going to share some DIY ideas that you can make for the kids or that you can help the kids make for others.  The 1st idea that I want to share is the refill for the magic mixies Cauldron. There are a lot of ideas out there these are the ones and the order that I found work best. There are 7 steps before the spell is complete and the surprise appears.  The 1st things you need is 6 containers, the cauldron comes with a flask for water for the first step. For the rest of the steps you can use whatever you have on hand. I think that an eclectic collection of jars and containers make it feel like special ingredients for a magical spell. Spritz bottles from the Dollar Store are a good addition and spare mini cauldrons from magic mixies are great for dry ingredients.  This is my list of ingredients: Step 1. Water Step 2. Bath salts Step

Advent Calendars 2023

Image
Welcome to my annual advent calendar post! Advent calendars and fairy gardens are probably my two favorite things to post about. Even though my kids like the store bought ones now and I don't make them like I used to I still love our family tradition of opening the advent calendar doors all together after supper.  This year Little Miss chose a Barbie advent calendar. The fun thing about this calendar is that the first day you open a Barbie doll and an accessory. Every day you open a new accessory. Little Man chose a Star Wars Lego calendar, again he is on a mission to collect as many Star Wars figures as possible.  This year I get my very own advent calendar. My mom bought it for me for my birthday and I can't wait to open it,  it's been staring at me for a month. This one is a 12 day advent calendar but I decided that I would just open it every second day to make it last 24 days.  I also filled my reusable advent calendar houses with tur

Thanksgiving Bingo Activity

Image
Canadian Thanksgiving was in October but I thought that I would share this Bingo activity for our American friends. I'm always tempted to celebrate Thanksgiving a second time once November comes around, because honestly who couldn't use more time to be Thankful (or more turkey and pie!)  I bought these Bingo cards from Hobby Lobby back on Labour Day. I modified them a little to be relevant to Canadian Thanksgiving, changing Christmas decorations to Halloween decorations and the reference to the parade but other than that all the rest of the clues were relevant. I bought these mostly to give the kids an activity to do but i was happy when everyone got involved. Instead of sitting down and playing a regular Bingo game (which you can do with this pack of cards.) I gave everyone a card and made it more like a scavenger hunt, anytime you see or hear something on the card you can cross it off  of your card. To make it interesting I put together a jar of mini c

DIY Costumes

Image
I love this time of year and, the possibilities for DIYS are endless between the costumes and decorations. There are so many fun things to make this time of year.  I especially love when my kids ask me to make their costumes. The other day I asked Little Man if he remembered the year I dressed him up like a lion. He said no, the only costumes that stood out to him were the ones I made for him, or bought ones that I enhanced to make the character that he wanted. This year Little Man wanted to be cousin It from the Adam's Family, to match his friends costumes.  Little Miss wanted to be Gabby from Gabby's Dollhouse, specifically the Halloween Gabby, dressed in a rainbow dress complete with cat tail.  Little Man's costume was fun to make. My initial idea was to use a grass hula skirt but I couldn't find a grass one, I found lots of plastic ones in green, blue and pink but no brown or grass ones. Pivoting slightly, we wandered the isles of the Dollar

Beware of Gnome

Image
Beware of the Zombie Gnome! This is the newest addition to our Haunted Fairy Garden. This gnome was in a paint your own garden gnome set that Little Man painted years ago.  The paint was wearing off so we decided to give him a new (after) life, and paint him as a zombie gnome. I love how weathered and beaten up he looks. I also gave my  welcome to our gnome  sign a spooky upgrade by painting the flip side to day 'beware of gnome.' Our Haunted Fairy Garden grows spookier every year. This year in addition to the zombie gnome and sign, I also repainted my fairy as a ghost fairy and we added a haunted tree house.  Happy Halloween!

Counting Activity

Image
A friend gave me these cute Mason  jar ornaments and little wood shapes one year for my birthday. They reminded me of catching bugs on a summer day. I decided to used them to make this counting activity that I played with Little Miss. I made this a few years ago before she started kindergarten. Back then we used this activity to practice counting but we've used it again recently to practice addition. This is another activity that is easy to throw into your bag and pull out at a restaurant or coffee shop.  What you need: ● Mason Jar shapes ● Small wood shapes, I had flowers, butterflies and birds ●Paint pens or markers ●Drawstring bag  What to do:  There are two sides to this activity.  Activity 1: Read the number written above the shape, pick out that many shapes from the bag.  How to make it: Write a number then trace the outline of one of the shapes beneath it.  Activity 2: Choose a Mason jar ornament then pick out the same number of shapes as traced on the jar and place them in

Colour Association Game

Image
This color association game is an activity that I made for Little Miss when she was a toddler, I recently came accross these pictures and thought that I would share this activity. This felt activity has an envelope on the back to keep all the peices together which makes it perfect to bring along to keep little ones occupied at a coffee shop or restaurant.  What you need: ● Felt 4 colours, 2 peices of each ● Peice of cardboard  ● Envelope  ● Glue gun and white glue  What to do: 1. Cut the felt into 4 equal squares 2. Cut the cardboard to the size of all four felt squares placed in a larger square. 3.Glue the felt onto the cardboard to make the game board.  4. Cut shapes out of the other peices of felt. I cut out hearts, triangles, circles and squares. Using white glue, glue the envelope to the cardboard side of the game board.  To use: Have the kids match the shapes with their colours on the gameboard or match the shapes together. Store the shapes in the envelope for the next use.

Fall Season

Image
Fall! It's here, it's finally here! Cooler weather, comfy sweaters and pumpkin and apple everything.  I have been waiting for this all month. When the kids go back to school it always feels like a reset for me, almost like a new year, I start a new calendar and we get ourselves back on a schedule. This year I have some great Blog Posts planned. In September I have two learning activities for toddlers. I came across the pictures when I was going through my computer. I found some activities I made when Little Miss was younger that I never shared. I thought that this would be a good time to share them, I always liked having a little pre-school schedule for the kids when they were younger and these are the types of activities I would prepare for them. For October I am going to share some pictures of our Spooky Fairy Garden. We add new things to it every year and I am looking forward to making our fairy garden spooky again this year. I hope you all enjoy the spooky season! Happy Cra

DIY Medal Desplay

Image
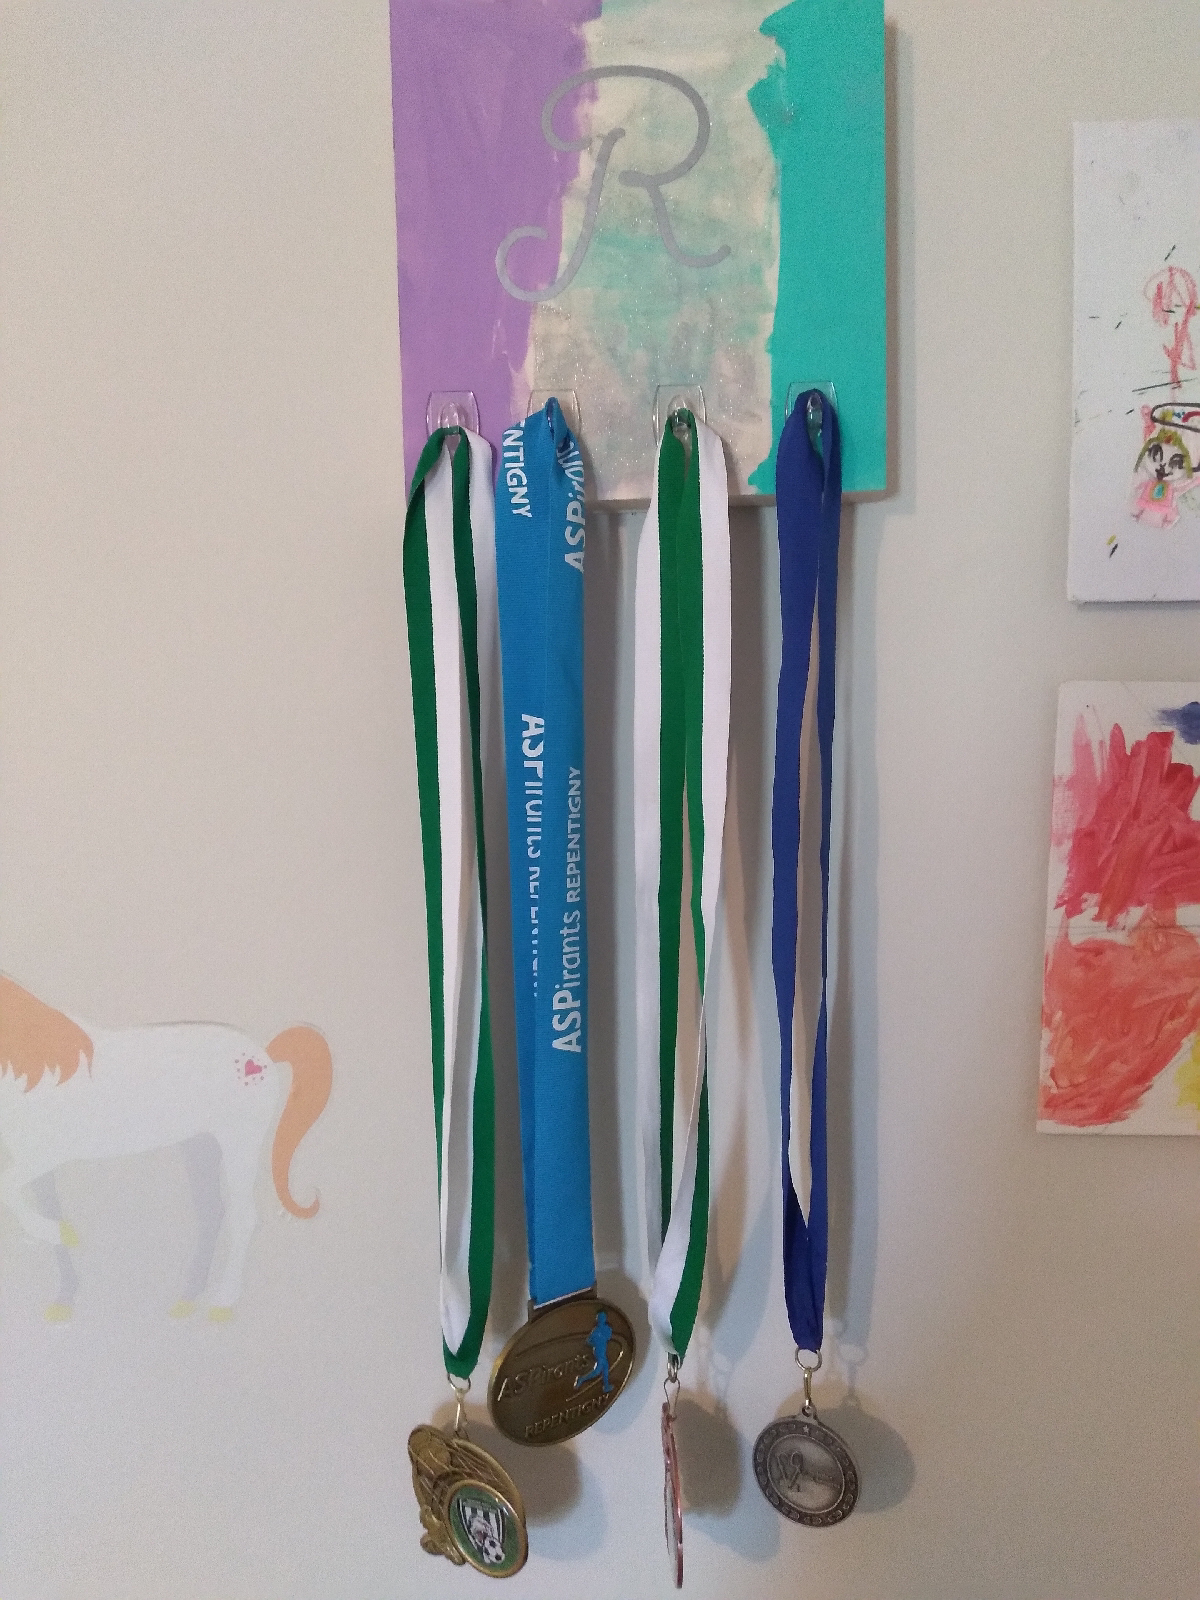
Summer is slowly coming to an end and although I am looking forward to sweaters and all the fall vibes we have had a great summer and we have had a lot of family fun. The kids both played soccer this summer and it was Little Man's first year as a referree.  The end of the soccer season means a tournament. Little Miss was so excited to display her soccer medal. We decided to make a little display for the medals she has so far (and some of mine!) What you need: • Wood frame (from the Dollar Store) •  Paint (We used acrylic, purple, turquoise and sparkle) • 4 hooks (I used the 3M removable transparent ones because that's what I had but any would work or nails if you don't have hooks) • Your child's initial (I printed mine with the cricut but a wooden letter from a craft store would look nice) What to do: 1. Paint the wood frame I the color or pattern of your choice. Little Miss chose the colors and design. 2. Wait for the paint to dry. M

Summerween

Image
There are only 3 months left until Halloween, not that I'm counting! At this time every year I start to think about Halloween and the fall. I dream about comfy sweaters and baking and spooky movies and books. This year, inspired by our favorite Gravity Falls episode Summerween, we decided to carve a watermelon, dress up in costumes and watch Spooky shows. It turns out that carving a watermelon is much easier than carving a pumpkin and the red watermelon color is perfect for a Spooky face, not to mention that watermelon smells a lot better than pumpkin.  Happy Summerween!

Summer Project

Image
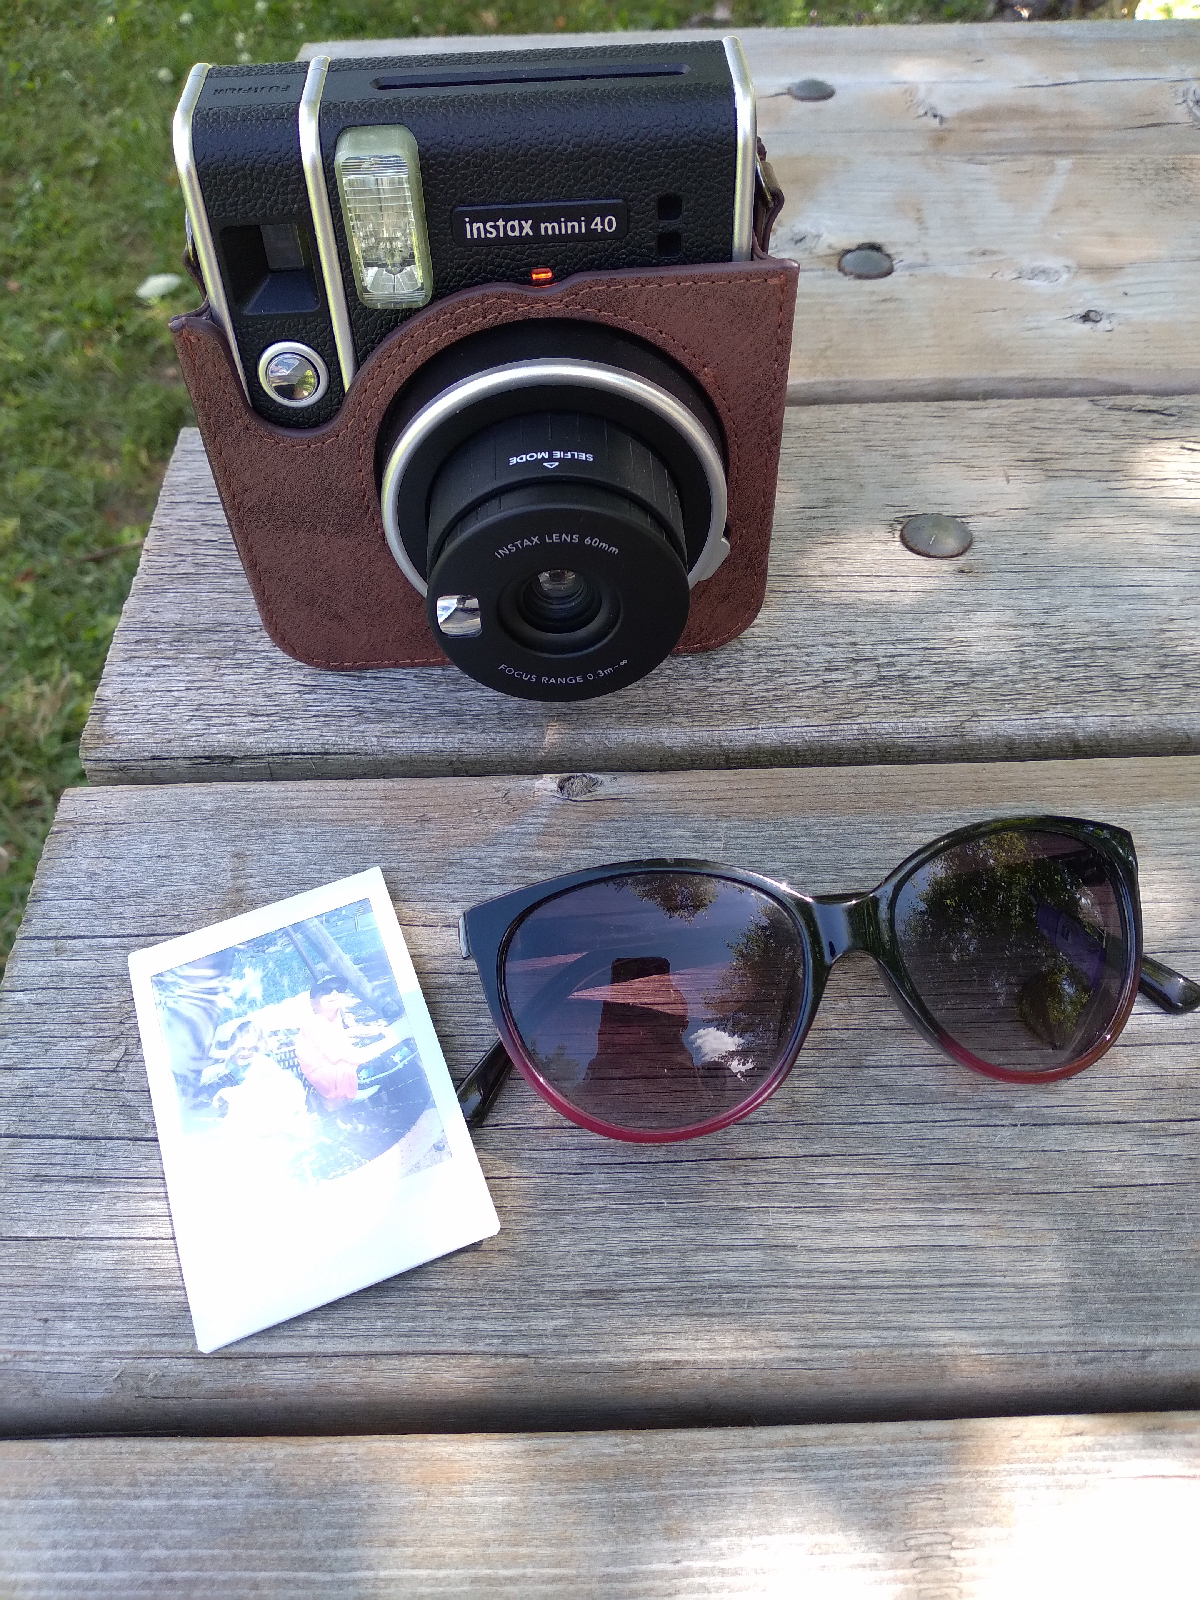
Our summer scrapbook. This is our second year doing this picture project. Last year I bought this Instax Camera with cute vintage inspired case and scrapbook with black pages. I wanted to involve the kids in creating a summer family album. They took turns taking the pictures and we decorated the pages with paint markers and stickers. By the end of the summer we had a scrapbook full of pictures and drawings  This year we are going to use an Instax photo album and I can't wait to see all the pictures we take on our summer adventures this summer! Happy Summer Adventures!

Summer Adventures

Image
Summer vacation has officially kicked off! The kids are done school and I'm on summer work hours.  We have some good activities, outings and a vacation planned.  At the start of each summer I like to make a kind of bucket list to be sure to take advantage of all the activities in the area. It doesn't have to be expensive activities, one summer we made a point of trying out different parks and different splash pads and community pools. This year I plan on taking advantage of local beaches and spending as much time outside and in the water as possible.  I hope you enjoy your summer activities and get to take advantage of time outside. Stay tuned for some summer ideas!

DIY Easy Bake Waffles

Image
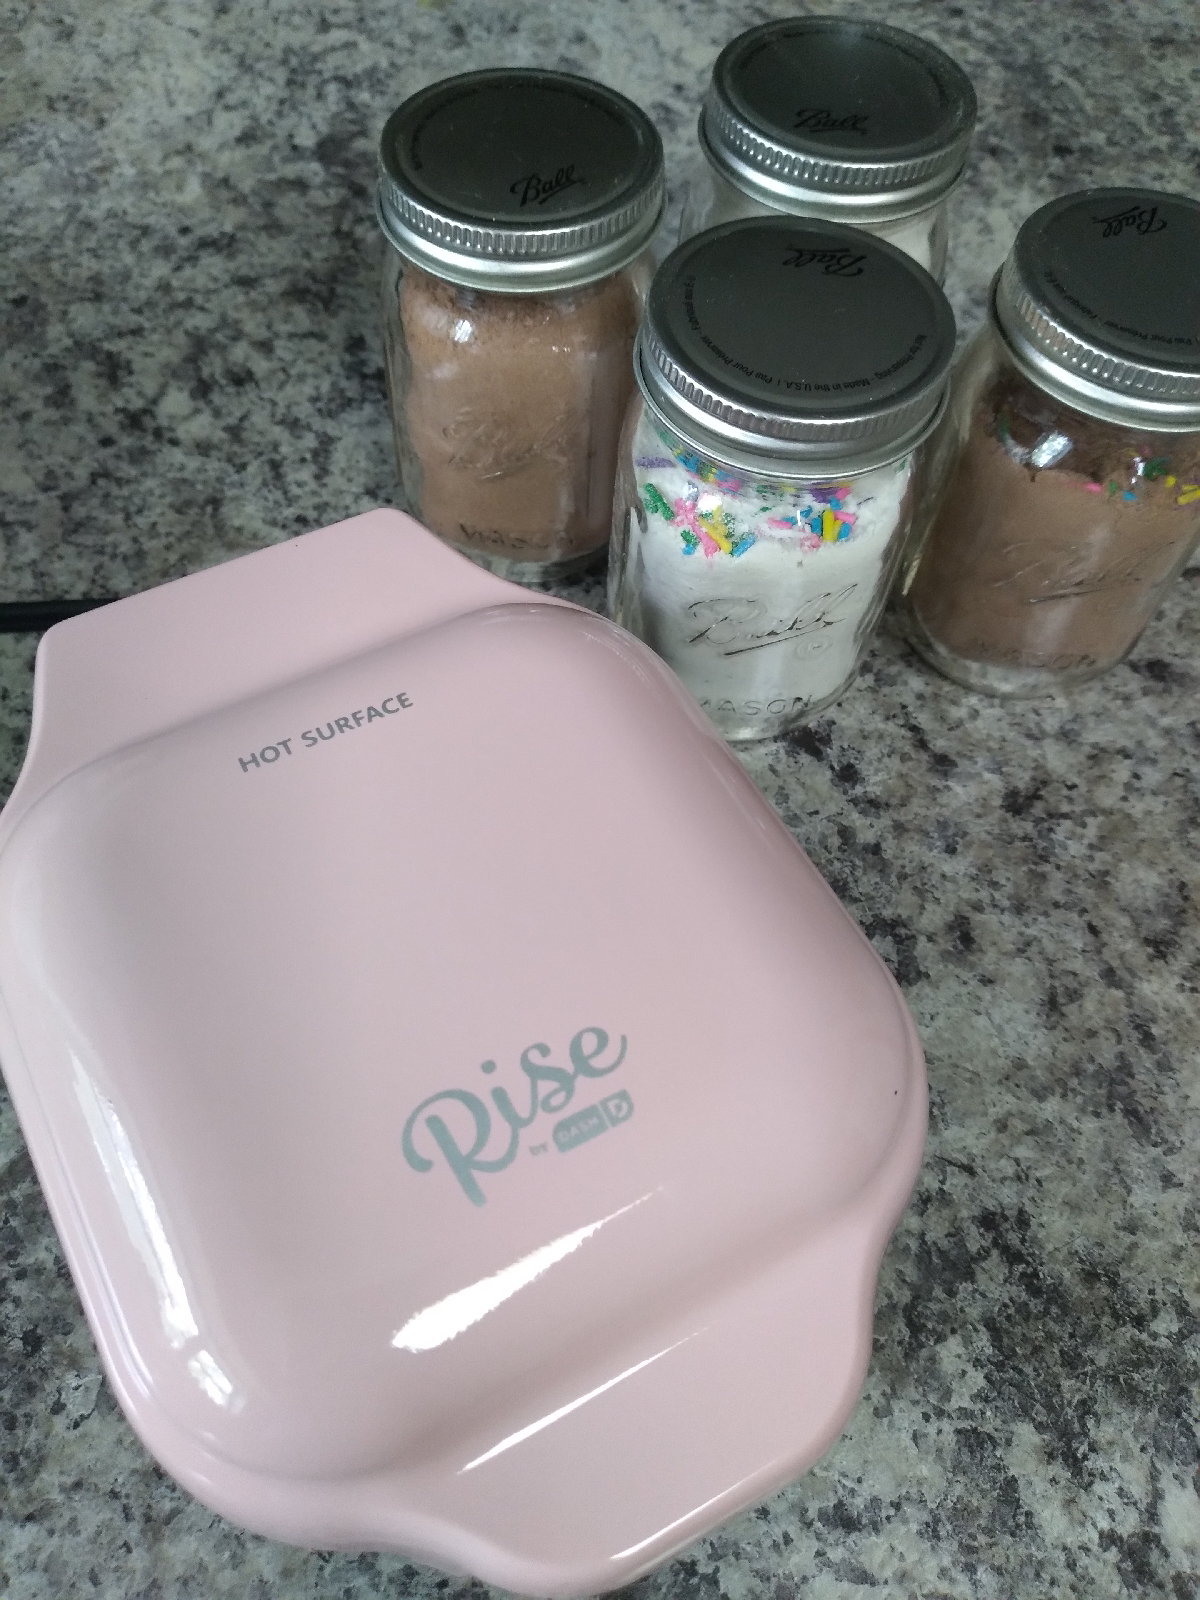
Little Misse's birthday just passed and she asked for an easy Bake Oven. I never had one but I thought it was a good idea but the down sides are that they are big and expensive and the refills are expensive for what they are. The thing is that Little Miss already bakes with me. I did want to get her something that she could use by herself but that would be more useful. I found this pink, heart shapped waffle maker at Canadian Tire. It makes mini waffles and Little Miss loves waffles (who doesn't?) Along with the waffle maker I found a pack of 4 little Mason jars.  I wanted to make little single serving waffle mixes that she could use as you would an Easy Bake Oven mix. To do this I measured our 1/2 of our favorite waffle mix and split that into 4 portions. I made different flavors, birthday cake (by adding sprinkles) brownie (by adding 1 tsp of cocoa.)  When we made the waffles mixes we added 1 egg 1/4 milk and 1tbs melted butter. Along with

Flower Favors

Image
I made these favors for a Mother's Day event but I never got around to posting this, besides, I think this would be a great party favor idea for an engagement party or a birthday party.  What you need: ● 24 carnations (or other colorful flowers) ● Tissue paper (I chose pink, gold and purple) ●Ribbon, twine etc.  ●Kraft gift tags ●Vases (one per table) 1. Open the packaging to separate the bouquets. Since the vases I was using were short, I cut the flowers to fit.  2. I opened the packages of tisue paper and the package of twine, separate the Tissue paper and cut 24 length of twine or ribbon. 3. Taking one flower at a time, choose one or two peices of tissue paper, gather the paper in the middle, place the flower in the paper and attach the paper with the twine.  You can prepare the flowers a few days ahead of time, keeping them in vases with fresh water, making sure bot to fill too high.  For our gathering I placed 5 flowers in each vase. I added a stack of

Mud Kitchen

Image
My little Miss is getting to the age where she doesn't play with her play kitchen as much anymore, unless there's mud involved! I moved all her kitchen toys and playfood outside, the result is so much fun to see. She is rediscovering the toys that she hasn't played with for months.  When I was looking up ideas for mud kitchens Isaw a lot of beautifully muddy wooden kitchens that handy people had built. I went in a different direction, I decided to repurpose the toys we had in the house, most of which we've had since Little Man was this age. There was a corner of our backyard that had been a garden but the animals kept eating it so I gave up on that thought. We put down some mulch and some old fence panels for Little Miss to sit on. We used some old planters to hold the dirt, mud and water.  since our backyard is a bit of a wind tunnel I made sure to secure everything to the fence with bungee cords. Putting the mud kitchen next

Fairy Garden Sign

Image
I don't usually start setting up my fairy garden until May or sometimes June, depending on the weather but this year we had an unseasonably warm April so I set it up early this year. Over the years I have shared the different incarnations of my fairy garden. This year it looks similar to other years that we've lived in this house. I like my little spot next to the front door. It adds some whimsy to the front of our house.  My new addition this year is this slate "welcome to our gnome" sign. I made a small slate sign that read "gnome sweet gnome" a number of years ago. It has survived through many seasons and has a bit of character now but it still looks good. I haven't decided if I am going to replace the little one with this big one or simply have two. Can you ever really have too many gnome signs? Oh, my husband says yes!  I made my new gnome welcome gnome sign on a slate shingle given to me by a friend. It used to b

Bunny Napkin Holders

Image
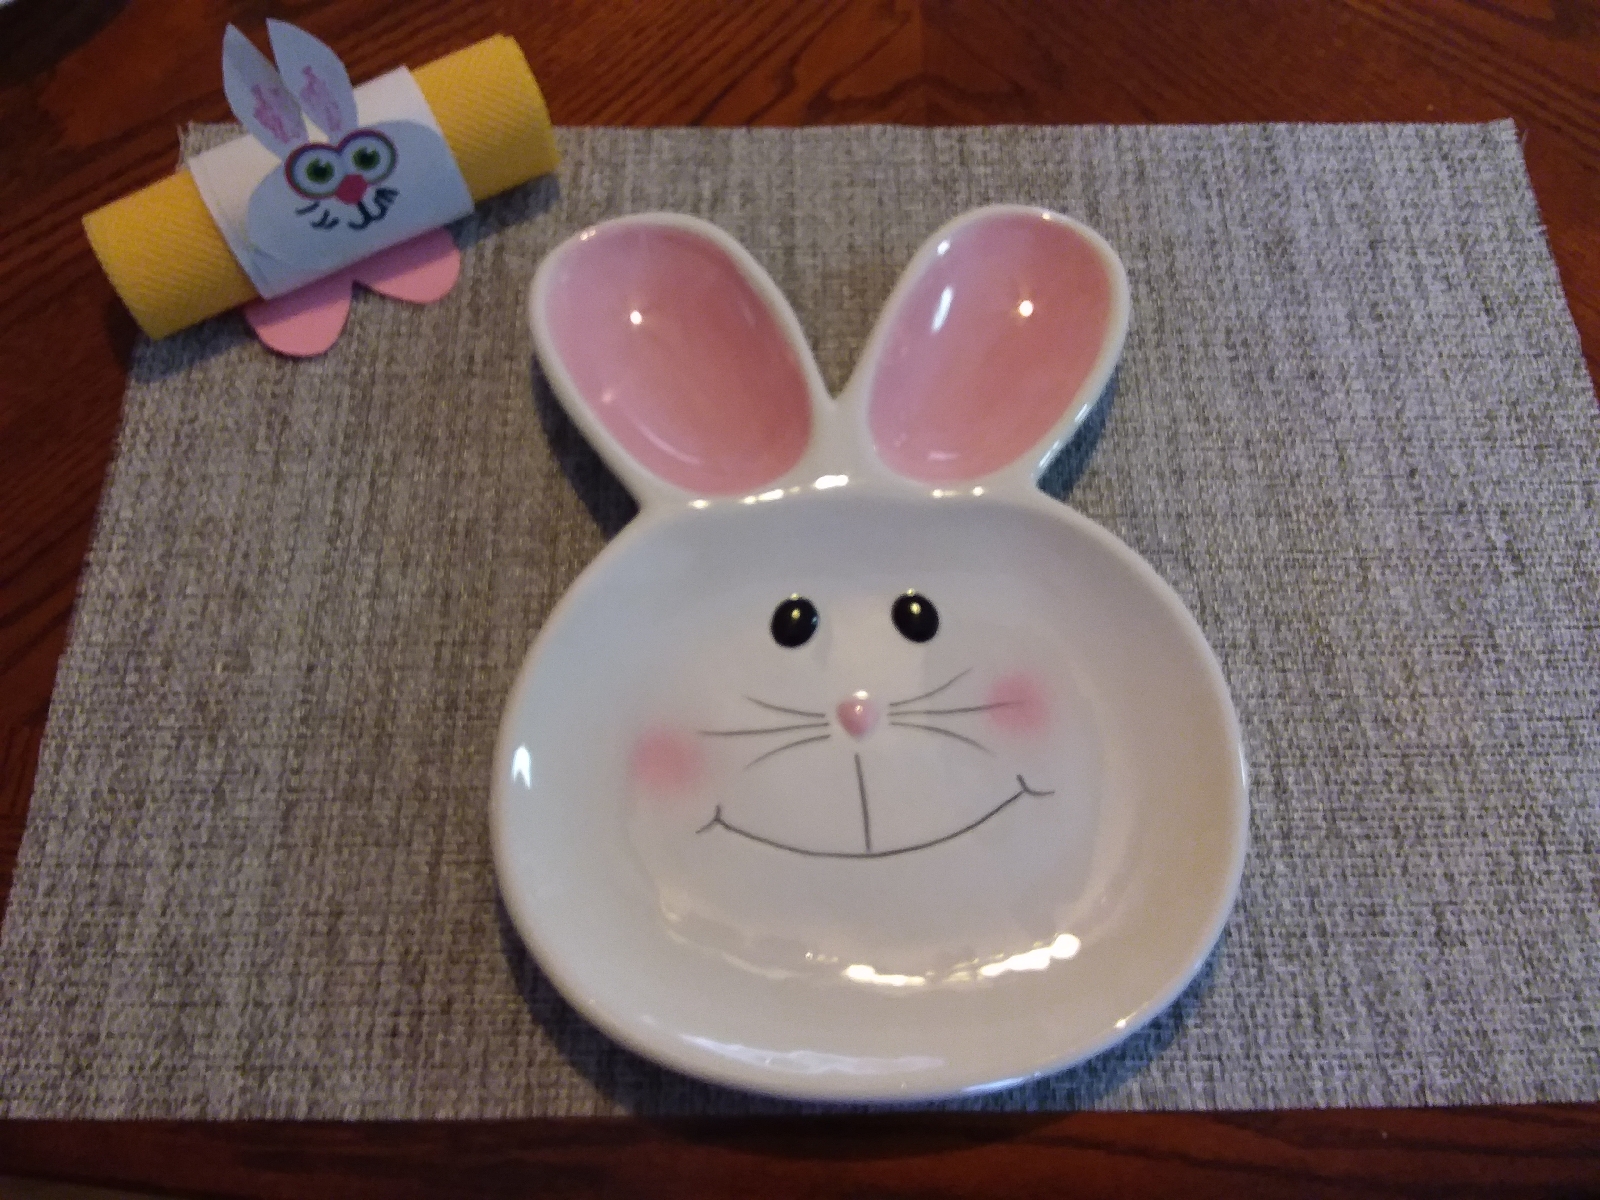
The week leading up to Easter this year we were all sick. We weren't much in the mood for decorating or getting ready for Easter. We're starting to feel better now so Easter Monday we're going to do some Easter crafts and have our Easter celebrations. For anyone else looking for some last minute table decor or an Easter craft this is an easy bunny napkin holder idea. What you need: •Empty paper towel roll  •White and pink construction paper •Eye stickers or googly eyes • Markers •Scissors and glue What to do: 1. Cut the paper towel rolls into 4 equal sections. 2. Cut one peice of white construction paper into 4 strips.  3.Cover the paper towel rolls with the white construction paper strips. Glue as you roll the paper around the roll. 4. Cut 4 bunny head shapes out of the other peice of white construction paper. Draw a bunny face complete with googly eyes and pink ears. Glue the bunny heads on the rolls.  5. Cut 4 hearts out of the pink construction p

Pot-o-lucky charm cookies

Image
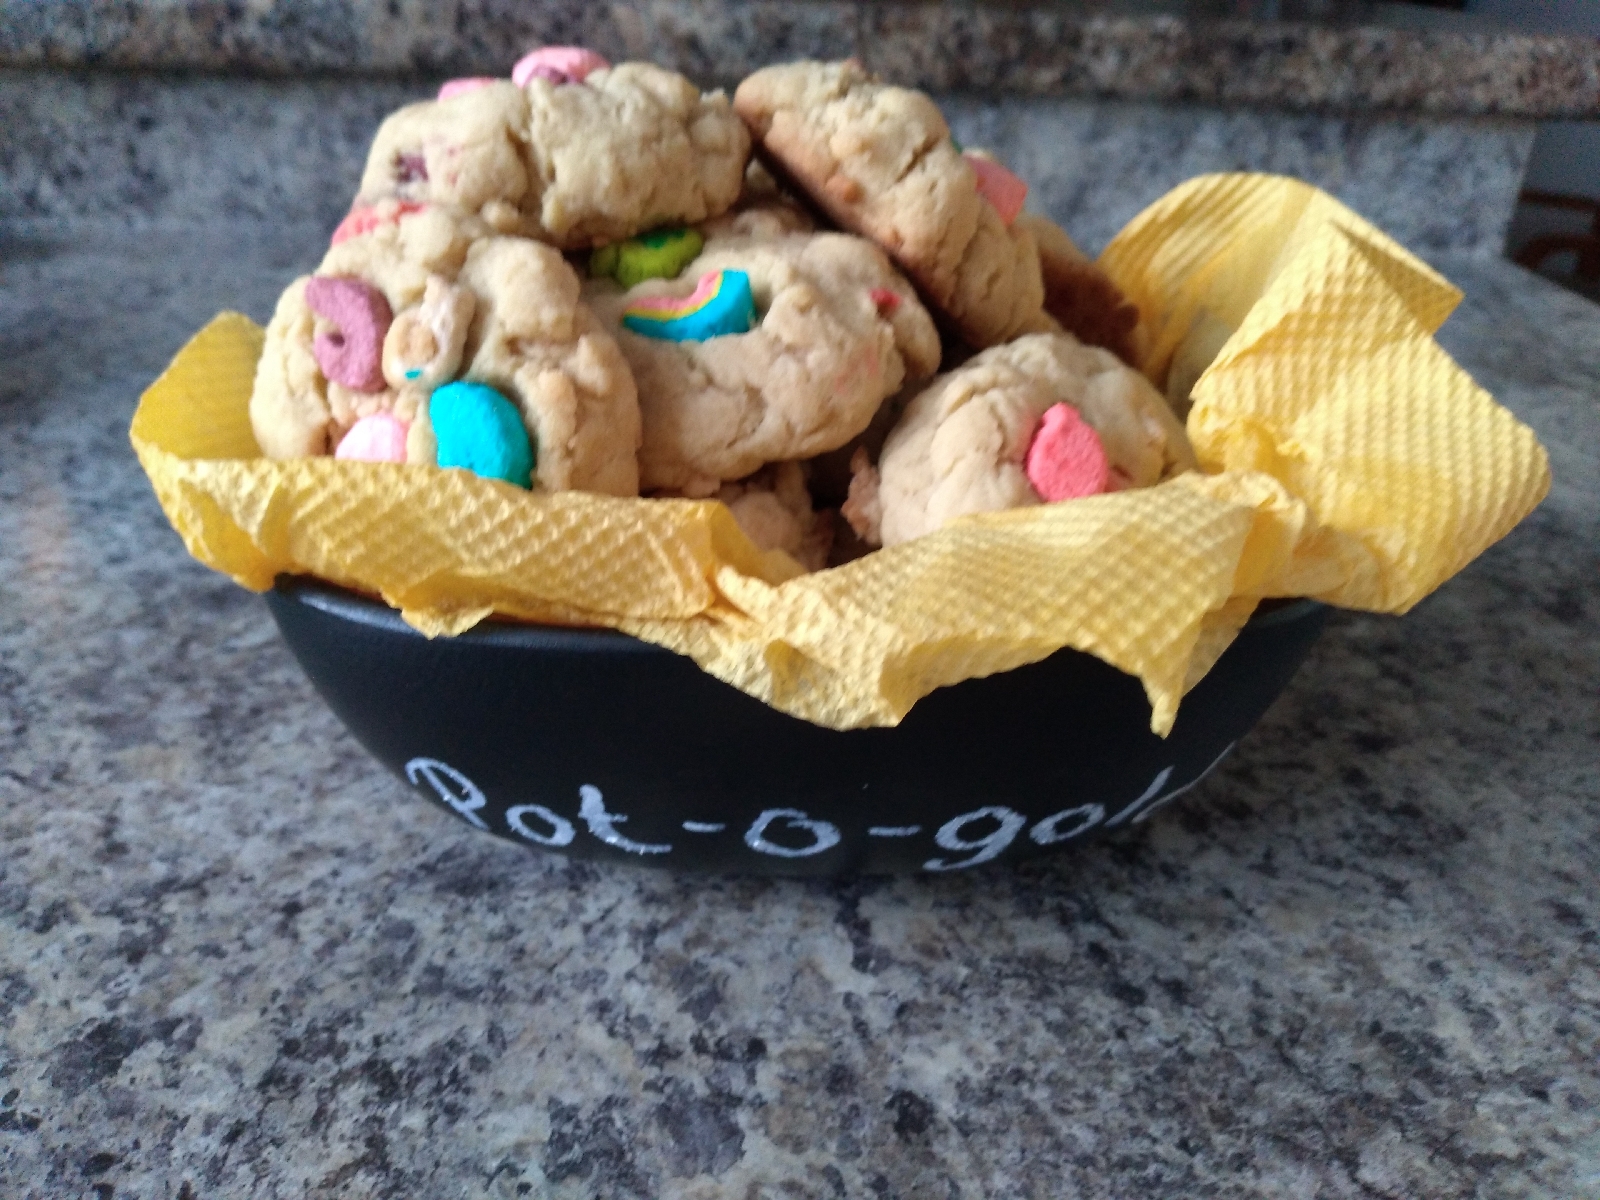
I bought a new cookbook for Little Miss and I to cook from together, it's called  C'est moi le chef  (I am the chef.) There are a lot of fun easy recipes for kids and parents. One that stood out to us was a recipe for Lucky Charm cookies. It seemed perfect to make for a St-Patrick's pot-luck brunch we attended last weekend. To give it the look of a pot of gold I served them up in these black Corelle bowls. I accented it with yellow-gold napkins and wrote "pot-o-gold" in chalk crayon. The cookies were a hit and I will definitely make them again.  Happy St-Patrick's Day and happy baking! 

St-Patrick's Day String Art

Image
I got the idea for this St-Patrick's day craft from a Valentine's craft I made this year. I was inspired by a heart garland I saw online. It was a garland of hearts which were made of yarn wrapped around cardboard. I tried my hand at it and made a couple of multi-coloured hearts and hung them from the handles of my dinig room hutch. They were very fun and pretty easy to make. Little Miss and her friend had fun making some after school.  I was at the Dollarstore the other day and I found this green and gold yarn. I thought I would use the string technique to make some shamrocks to decorate for St-Patrick's day. What you need: Green yarn 2 equal peices of cardboard  Scissors and a pen What to do: 1. Draw a shamrock shape on the cardboard and cut it out. 2. Trace the 1st shamrock on the 2nd peice of cardboard and cut out the second shamrock. 3. Start wrapping the shapes with the yarn. Hold the end down, you can tape it down to secure it or go over the l